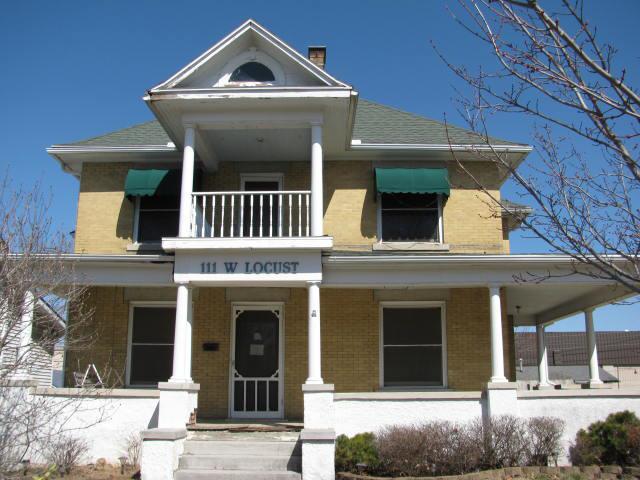
Our FourSquare

Our FourSquare

Sunday, June 1, 2014

Before and Afters

This will be a post that is continually edited.

Bath

Tub/Shower Area BEFORE...


Tub/Shower Area AFTER...

Yes - the tile extends past the tub - but here is the reasoning: we plan to put a hook up for robes, towels, etc. and that way the wall won't get wet. It seemed like a good idea at the time. Now I think I'm not sure I like it...sigh.


Vanity Area Before...


This is the vanity area - you can see the outline of some  kind of cabinet from before.


Vanity Area After...


The Built-In...

Chuck found these really cool old cabinet doors and we had to do something with them, so....
we made a cabinet above the toilet and a built-in linen/etc. cabinet.

The beginnings of the cabinet above the toilet.  See the DH on the ladder? He's amazing!  A big thank you goes to Jared for allowing us to borrow the ladder we bought for him.  It's a great ladder, if only it were lighter!

Here's the beginning of the built-in.  We (me) originally planned to stain the back, but decided it would look better painted white.

This is the door above the toilet. It had originally been painted several times.  The last coat was a yellowy white.  I scraped and sanded and still the chips show through.  We should have just gone ahead and used paint remover.  It may happen someday - but for now, it's fine.

This one didn't have paint on it.  Which brings me to a conversation about paint today.  Add the lead back in! OK...probably not, but geeze!

Old window, scraped and painted.  Probably should have re-glazed, but it will be fine - it makes it look more authentic, right?

Getting closer to done....not a fan of this paint!
Notice the top of both cabinets.  Chuck fabricated them to resemble the original medicine cabinet in the upstairs bathroom.

We think this bath might have been originally used only by the maid.  The original owners had several live in maids over the years. I have their names on ancestry.com. I'll look them back up and add them to this post.

The original bath was quite a bit smaller.  The tub is quite narrow. Originally it was scooted closer to the toilet by 8-12 inches.  There was a built-in on the other side from what we could tell.  We believe that room was the original dining room.  This room was most likely the maid's bathroom and a butler's pantry based on the various things we found when we gutted the bath.

Where we put the built-in linen cabinet was a doorway into the kitchen.  We thought about re-establishing the door way and then decided against it to keep the larger bathroom size and give more privacy for the bathroom.  Where the sink is, it looked like there was shelving and cabinets or possibly a dry sink.  Not really sure.  I thought we'd taken pics of it, but right now I haven't located them.

Almost finished, just need to add the bottom piece.  See the hardware?  I followed Nichole's advice from "Rehab Addicts" and cooked them in the Crock Pot for a while.  The paint did come off fairly easily! 

New hinges. The knob we found in an antique shop in Marshfield.

The finished cabinet.  Waiting for the paint to fully cure before leaving the doors closed.

The Bathroom Painter


 Our painter showed up, armed with not just 1 but TWO paintbrushes, her painting clothes and a smile that brightens the universe!  She is highly skilled and I would recommend her to anyone.


Look at the wonderful technique!
We gave her a red solo cup with about 2 inches of paint in the bottom and this brush and she did quite a good job honestly - especially for a 2 year old.  I don't think she got any paint on her clothes.  She had a bit on her hands, but not very much!  Probably less than I.  She painted that whole wall up to where she could reach!
This is one of the items still left on the 2 page list...UGH!

This is now completed, but no pics yet. Stay tuned.

Love plastic with the tape attached!

From this pic you can see the exposed brick.  You can also see it in the picture of the painter, Emma.  At the base we are going to put back some plaster so the baseboard won't look odd.

This is the vanity mirror.  We added a door header as the base to extend the height of the mirror off the vanity (dresser). I think the finished project looks fantastic.  At first we thought about putting tile or a beveled mirror piece on the bottom of it - but I think I like it just fine without that.

The beginnings of the built-in for the main bath.

Tub/shower with its lovely new tile surround.  The tilers did an excellent job!  The shower curtain rod has been fabricated by Chuck. I love it!

With the Shower curtain - obviously, LOL

The Billings flea market baseboard.  Looks like it is close to original for the house.


And...the final look. Dresser/mirror - flea market - stripped of original veneer, new veneer glued in place, new knobs added (we have since put on glass knobs - I love these but they are shiny brass and I thought when I ordered them they were antique brass - perhaps there's a way to antique the brass), sink, faucet, door header, new wainscot, flea market baseboard and there you have it, easy peezy, lemon squeezy!


Some recent accomplishments...

Progress has been made.  Other than touch-up painting and adding some plaster back onto a small part of the brick outside wall - the main floor bath..... it's DONE!!!! Can I get a WOO F HOOOOOOOO?

Out of the whole house, that 6 x 12 foot room had the longest to-do list.  How does that happen?  To its defense, it's also the only room that will probably have had a full gut.

I'm not sure how I feel about the sink vanity. It's gorgeous, but I'm just worried how it will hold up to water. After putting 5 layers of poly on it with a light steel pad sanding in-between each, I'm hoping it's enough.  I found some poly meant for a more water use area. Is it too late to apply - or do we just wait until we need to redo the poly?


I think this is what we should have used - but I didn't know it existed until we had put the sink in.  We'll see. I really love the color and richness of Varathane products!!! Any thoughts about adding another coat now?

LIVING ROOM

We have almost finished the living room - temporarily. Temporarily as in - 2-20 years. Eventually we'll be stripping all the wood work and staining it. We still need to either find the fireplace mantel at a flea market/antique place or build it - I think the cost is going to be about the same either way we go.

We - I think we - I know I, and the DH seems to agree, wish to have a mantel that has columns like on the front porch of the house.  I found some columns at a flea market for roughly $14 and gosh - in the flea market they seemed the right diameter, then when you get things like that home - well they are a tad bigger than what they originally appeared.  I think they may work - OR - we'll find another use for them.

We built a faux fireplace area in the living room to conceal the air returns for the furnace and eventual AC. Eventual meaning at least by July.  Honestly though, I think the only time we'll use it is when the humidity is above 78 percent in the house and / or the temp is above 90 degrees.  Old houses were definitely built to cool themselves back in the day.  When you open the windows correctly it vents the hot air out and has a nice breeze drafting throughout the house. Last summer we found it uncomfortable only a few times.

Several weekends ago I washed down the entire living room--what a task---washing every inch of the walls and woodwork---.to prep it for new paint over who knows how many layers of previous paint and several layers of wallpapers as well. It looked better just having all the stain from tobacco and whatever else washed clean. I didn't want to do that in the beginning of this house adventure...but then I just needed a room that was presentable...a place to get out of all the restoration, mess, etc.  Possibly down the road that wallpaper/paint mess will be removed, but for now - flat paint is fabulous!!  It just seems to suck all the bad into the color and it disappears unless you look closely. DON'T LOOK CLOSELY!!!! Not nice!  The baseboard looks very nice -  all clean and shiny.  We've been using Valspar paint and using "historical colors". I have to wonder if these places really exist - but nevertheless - I like the colors!  The living room is Churchhill Hotel Vanilla.
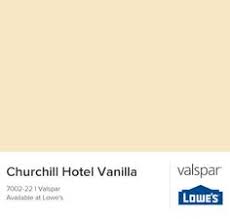
This probably doesn't look any thing close to what the paint actually looks like - but I can assure you it's beautiful! Think Vanilla Bean ice cream!!
It looks like a rich vanilla ice cream!

I love how it looks with the enamel trim and I think it will look just as good when we remove the paint and stain the wood a dark walnut or mahogany color.

**Side note: I looked up where the Historic colors come from - It's through the The National Trust for Historic Preservation
So here is the hotel that our lovely vanilla color was inspired by: The Churchill
And this is where our bathroom color comes from: Lyndhurst  Lyndhurst

Soooo, I guess that's for real - not just a ploy to cause me to buy their "Historic" paint colors.